Icons on top bar
The top bar gives you quick access to:
Fixed position control
The various climate controls are set to a fixed position (0 or off) by default. You can manage the fixed position settings on the fixed position screen.

Figure 4: Fixed position screen
To open the fixed position screen, tap the Fixed Position icon ' ‘ on the top bar. The fixed position screen displays all the associated climate controls. You can configure the fixed position settings independently for each zone. You can choose from:
-
A fixed position
This means you set a fixed position or operating mode.
-
Control mode
Control mode means that the settings from stage control will be used.
Configuring fixed position settings
To configure the fixed position settings, proceed as follows:
- Tap a value. A pop-up window appears.
- Choose one of these:
- Enter a fixed position (for example, 40%) or a fixed operating mode (for example, on).
- Tap the Control Mode icon ‘
 '.
'.
- Tap confirm ‘
 '.
'.
You have configured the fixed position settings.

Figure 5: Configuring fixed position settings
Fixed positions are not adjusted for the climate conditions inside your greenhouse and they apply for the entire day. Fixed position control enables a desired position or mode to be achieved quickly without altering any of the other program settings.
Manual valve group control
When you activate a valve group manually (i.e. execute a manual start), the irrigation program activates the valves assigned to that group and applies the preprogrammed recipe. You can activate a valve group manually on the Manual valve group control screen.
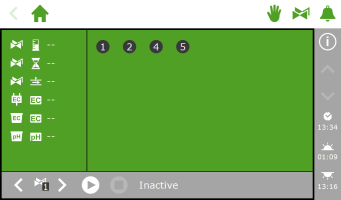
Figure 6: The Manual valve group control screen
- Tap the Manual Valve Group Control icon ‘
 ' on the top bar.
 - Select a valve group (bottom left).
- Tap the Start icon ‘
 '.
'.
You have activated a valve group.
The Manual valve group control screen displays the details of the valve group, such as the volume, the duration and which valves are active.

Figure 7: Active valve group
If you want to a different recipe to be applied for a manual valve start, you can change the EC, pH and volume settings of the valve group. Do not forget to change the settings back afterwards. An alternative method is to assign the desired valves to a group that is still 'free'. You can program different recipe settings for this group without changing your standard recipes.
Alarm screen
On the top bar, there is a bell icon ‘ ' that enables you to access the alarm screen. When this bell is active, it means that an alarm is currently present.
- Tap the (active) bell '
 '. The alarm screen opens.
The alarm screen displays information about your current alarms and your alarm history. If you open the alarm screen and no alarms are currently active, then the following text is shown: No alarms present!
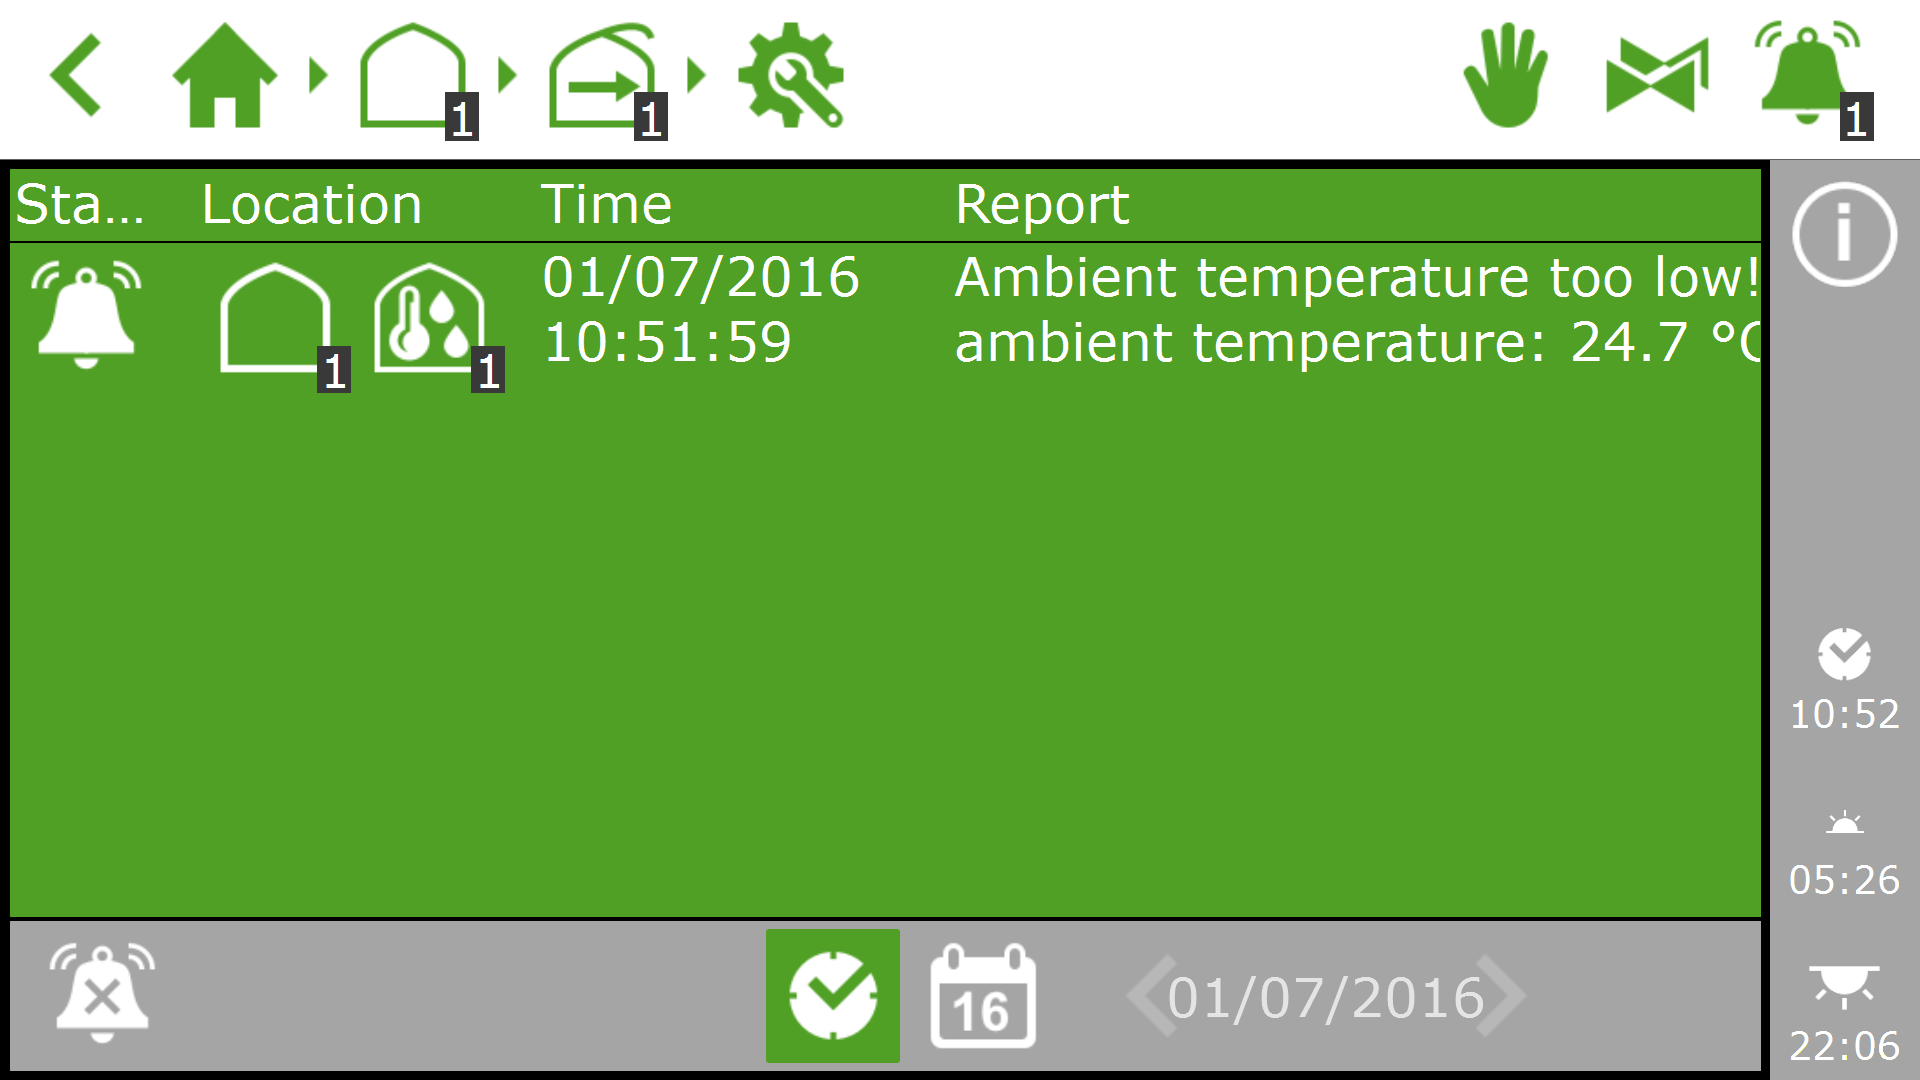
Figure 8: The alarm screen
The alarm screen lists the following information for each alarm: status, location, time and corresponding message.
If you tap an alarm, a pop-up appears with detailed information about the alarm. This is also where you can acknowledge the alarm. Acknowledging an alarm resets it. However, if the cause of the alarm has not yet been resolved, then the alarm will probably return almost immediately.
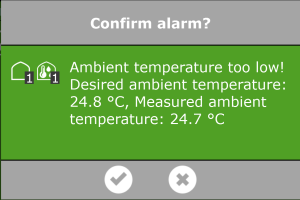
Figure 9: Alarm
To acknowledge more than one alarm at the same time, proceed as follows:
- Tap and hold the Alarm Condition icon ‘
 '.
'.
The alarms have been acknowledged.
At the bottom of the alarm screen, you will find the following buttons:

|
Switch alarm off This enables you to disable the bell of an active alarm. |

|
Alarm condition This button is selected by default. The current situation is displayed. |

|
Historical alarms This enables you to view historical alarms. If you tap this button, you can use the arrow keys to select the desired date. Historical alarms are saved up to one year. |
Alarm values can be set for various controls. These alarm settings can be found under the tiles with the Alarm Limits icon ‘ '.
'.
Alarm notification upon restarting
The Meteo-Go! is not immediately fully operational after a restart. As a result, the following alarm messages will appear: 'wind speed offline’ and 'wind direction offline'. You can acknowledge these alarms when the Meteo-Go! starts sending new measurement data. This takes at least five minutes. If there is hardly any wind (< 0,5m/s), then this will take longer. For safety purposes, the HortiMaX-Go! will use the windward side for the roof and side ventilation.